Spring cloud config 用SVN做配置仓库
很多企业还没使用Git仓库来管理代码,而是使用SVN。在Spring cloud 实现配置管理的时候,就需要另外配置,跟官方Sample 有点区别。
接下来操作步骤有:
1.创建SVN 配置repo
2.开发服务端
3.开发客户端
4.刷新客户端
话不多说,上干货。
1. 创建SVN 配置repo
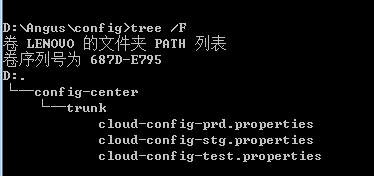
目录结果如下: 文件名称,暂时不纠结,往后看(MARK)。
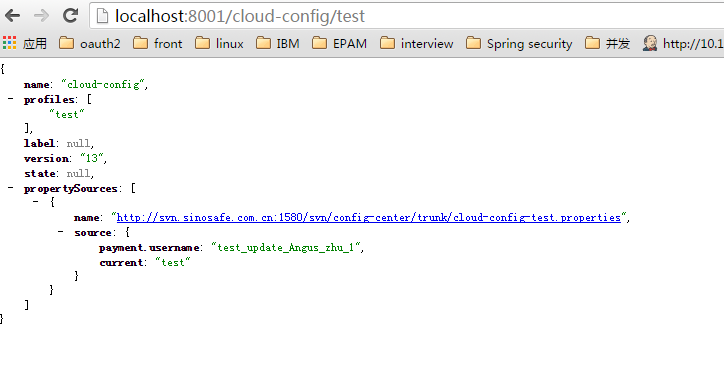
cloud-config-test.properties 内容:
payment.username=test_update_Angus_zhu_1
current=test
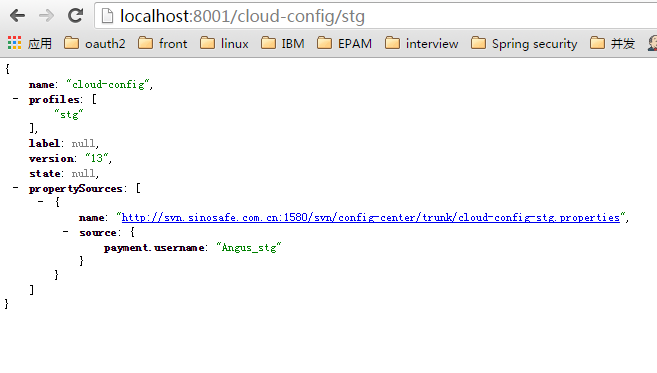
cloud-config-stg.properties 内容:
payment.username=Angus_stg
cloud-config-prd.properties 内容:
payment.username=Angus_prd
2. 开发服务端:
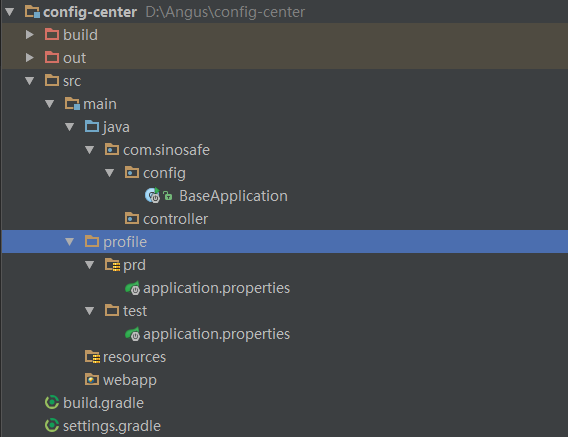
服务端项目结果如下:
a. 创建gradle 工程
build.gradle 如下:
import java.text.SimpleDateFormat

group ‘com.sinosafe‘
version ‘1.0-SNAPSHOT‘

buildscript {
    ext {
        springBootVersion = ‘1.5.2.RELEASE‘
    }
    repositories {
        jcenter {url ‘http://jcenter.bintray.com/‘}
        mavenLocal()
        mavenCentral()
    }
    dependencies {
        classpath "org.springframework.boot:spring-boot-gradle-plugin:$springBootVersion"
        classpath ‘org.springframework:springloaded:1.2.4.RELEASE‘
        classpath ‘org.hidetake:gradle-ssh-plugin:2.0.0‘
        classpath "io.spring.gradle:dependency-management-plugin:0.5.6.RELEASE"
    }
}


apply plugin: ‘java‘
apply plugin: ‘maven‘
apply plugin: ‘idea‘
apply plugin: ‘org.springframework.boot‘
apply plugin: ‘war‘
apply plugin: ‘application‘
apply plugin: ‘org.hidetake.ssh‘
apply plugin: "io.spring.dependency-management"

def env = System.getProperty("env") ?: "prd"


sourceSets {
    main {
        resources {
            srcDirs = ["src/main/resources","src/main/profile/$env"]
        }
    }
}

def date = new SimpleDateFormat("yyyy-MM-dd").format(new Date())
jar {
    baseName = "config-$env"
    version = ‘1.0-RELEASE‘

}
war {
    baseName = "config-$env"
    version = ‘1.0-RELEASE‘
}


repositories {
//    maven{ url ‘http://maven.aliyun.com/nexus/content/groups/public‘}

    mavenLocal()
    mavenCentral()

}

distZip {
    archiveName "$baseName-$version-$date-$env-RELEASE.zip"
}

dependencyManagement {
    imports {
        mavenBom "org.springframework.cloud:spring-cloud-dependencies:Camden.SR5"
    }
}
dependencies {
    compile "org.springframework.boot:spring-boot-starter-web:$springBootVersion"
    compile ‘org.springframework.cloud:spring-cloud-starter-config‘
    compile ‘org.springframework.cloud:spring-cloud-config-server‘
    compile ‘org.tmatesoft.svnkit:svnkit‘
}


springBoot {
    mainClass = "com.sinosafe.config.BaseApplication"
}
b. application.properties 配置文件
server.port = 8001
server.sessionTimeout=15
server.tomcat.max-threads = 800
server.tomcat.uri-encoding = UTF-8


#应用名称
spring.application.name=configServer
#spring.cloud.config.server.git.uri=${HOME}/Desktop/config
#指定配置中心使用svn管理
spring.profiles.active=subversion
#http-mutil    微服务svn配置中心
spring.cloud.config.server.svn.uri=http://svn.sinosafe.com.cn:1580/svn/config-center
#svn repo 可访问的用户名密码
spring.cloud.config.server.svn.username=jenkins
spring.cloud.config.server.svn.password=jenkins

spring.cloud.config.server.default-label=trunk

spring.cloud.config.enabled=true
#无需安全认证
management.security.enabled=false
#配置中心应用名
spring.cloud.config.name=cloud-config
#指定配置生效环境
spring.cloud.config.profile=test
说明:回到 步骤1.MARK 处,发现文件命名规则其实是:
{{spring.cloud.config.name}}-{{spring.cloud.config.profile}};即客户端生效读到的
cloud-config-test.properties;
c. 启动工程
-Denv 是指定取profile下面test目录下面的文件作为生效配置
d.启动后,查看不同环境下配置的参数
stg环境:
test 环境
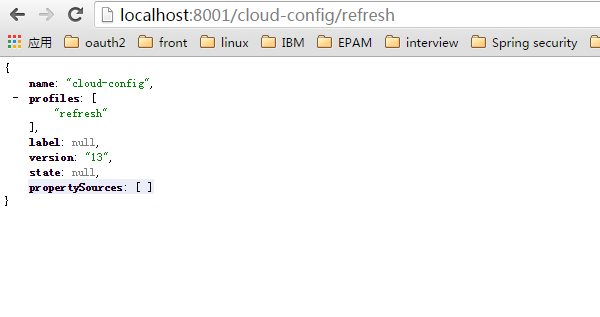
刷新配置,查看版本
本文出自 “成熟中的猪” 博客,请务必保留此出处http://idoudou.blog.51cto.com/1376341/1936981
文章来自:http://idoudou.blog.51cto.com/1376341/1936981
