入门教程:.NET开源OpenID Connect 和OAuth解决方案IdentityServer v3 MVC认证与授权(四)
本教程将搭建一个最小能够运行的IdentityServer。为简单起见,我们将identityserver和客户端放在同一Web应用程序-这可能不会是一个很现实的情况下,但可以让你不太复杂的开始。
完整的源代码可以在这里找到。
Part 1 - MVC MVC认证与授权
在第一部分中我们将创建一个简单的MVC应用程序并添加认证通过identityserver它。然后,我们将有一个更仔细的看claims,claims的变化和授权.
创建一个 web application
在Visual Studio 2013中,创建一个标准的MVC应用程序和设置认证,“没有认证”。

你可以在属性窗口启用SSL
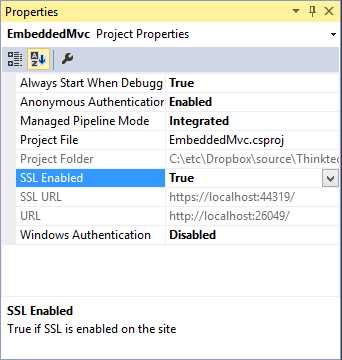
注意:不要忘记更新你的项目属性中的url
添加 IdentityServer 引用
IdentityServer基于OWIN/Katana作为NuGet包。要将其添加到新创建的应用程序上,安装以下2个包:
install-package Microsoft.Owin.Host.Systemweb
install-package Thinktecture.IdentityServer3
IdentityServer配置——客户端
IdentityServer需要一些关于客户端信息,这可以简单地提供使用客户端对象:
public static class Clients
{
    public static IEnumerable<Client> Get()
    {
        return new[]
        {
            new Client
            {
                Enabled = true,
                ClientName = "MVC Client",
                ClientId = "mvc",
                Flow = Flows.Implicit,

                RedirectUris = new List<string>
                {
                    "https://localhost:44319/"
                }
            }
        };
    }
}
IdentityServer配置——用户
下一步我们将添加一些IdentityServer用户-这里通过提供一个简单的C#类完成,当然你可以从任何数据存储加载用户。我们提供了ASP.NET Identity 和MembershipReboot支持检索用户信息。
public static class Users
{
    public static List<InMemoryUser> Get()
    {
        return new List<InMemoryUser>
        {
            new InMemoryUser
            {
                Username = "bob",
                Password = "secret",
                Subject = "1",

                Claims = new[]
                {
                    new Claim(Constants.ClaimTypes.GivenName, "Bob"),
                    new Claim(Constants.ClaimTypes.FamilyName, "Smith")
                }
            }
        };
    }
}
添加 Startup.cs
配置启动类。在这里,我们提供有关客户信息的用户,范围,签名证书和其他一些配置选项。生产要从Windows证书存储区或其他固定源负载签名证书。这里我们简单地添加到项目文件(你可以下载一个测试证书的地方。它添加该项目并将其属性【复制到输出目录】更改为始终复制。
public class Startup
{
    public void Configuration(IAppBuilder app)
    {
        app.Map("/identity", idsrvApp =>
            {
                idsrvApp.UseIdentityServer(new IdentityServerOptions
                {
                    SiteName = "Embedded IdentityServer",
                    SigningCertificate = LoadCertificate(),

                    Factory = InMemoryFactory.Create(
                        users  : Users.Get(),
                        clients: Clients.Get(),
                        scopes : StandardScopes.All)
                });
            });
    }

    X509Certificate2 LoadCertificate()
    {
        return new X509Certificate2(
            string.Format(@"{0}\bin\identityServer\idsrv3test.pfx", AppDomain.CurrentDomain.BaseDirectory), "idsrv3test");
    }
}
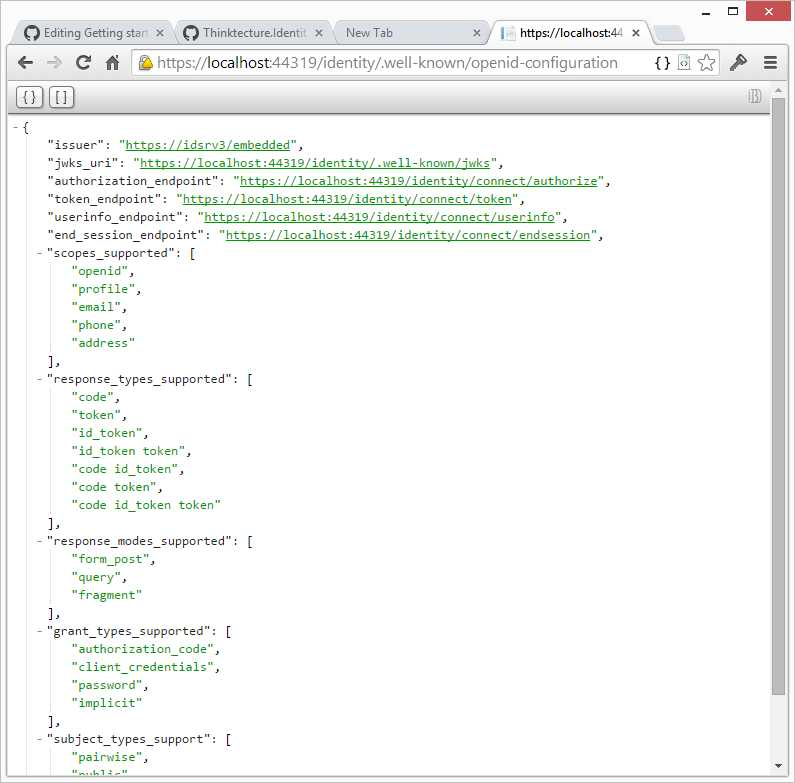
在浏览器中输入以下地址以检查配置https://localhost:44319/identity/.well-known/openid-configuration
注意:
最后一件事,在配置文件中添加下面的代码,否则我们的一些嵌入式资产将不能正确使用IIS加载
<system.webServer>
  <modules runAllManagedModulesForAllRequests="true" />
</system.webServer>
添加和配置OpenID Connect 中间件
增加OIDC 认证的MVC应用程序中,我们需要添加两包:
install-package Microsoft.Owin.Security.Cookies
install-package Microsoft.Owin.Security.OpenIdConnect
在startup.cs中配置默认认证类型为cookie
app.UseCookieAuthentication(new CookieAuthenticationOptions
    {
        AuthenticationType = "Cookies"
    });
使用嵌入的OpenID Connect Server
app.UseOpenIdConnectAuthentication(new OpenIdConnectAuthenticationOptions
    {
        Authority = "https://localhost:44319/identity",
        ClientId = "mvc",
        RedirectUri = "https://localhost:44319/",
        ResponseType = "id_token",

        SignInAsAuthenticationType = "Cookies"
    });
添加一个受保护的资源和Claims
一个受保护的资源:
[Authorize]
public ActionResult About()
{
    return View((User as ClaimsPrincipal).Claims);
}
相应的视图看起来像这样:
@model IEnumerable<System.Security.Claims.Claim>

<dl>
    @foreach (var claim in Model)
    {
        <dt>@claim.Type</dt>
        <dd>@claim.Value</dd>
    }
</dl>
Authentication and claims
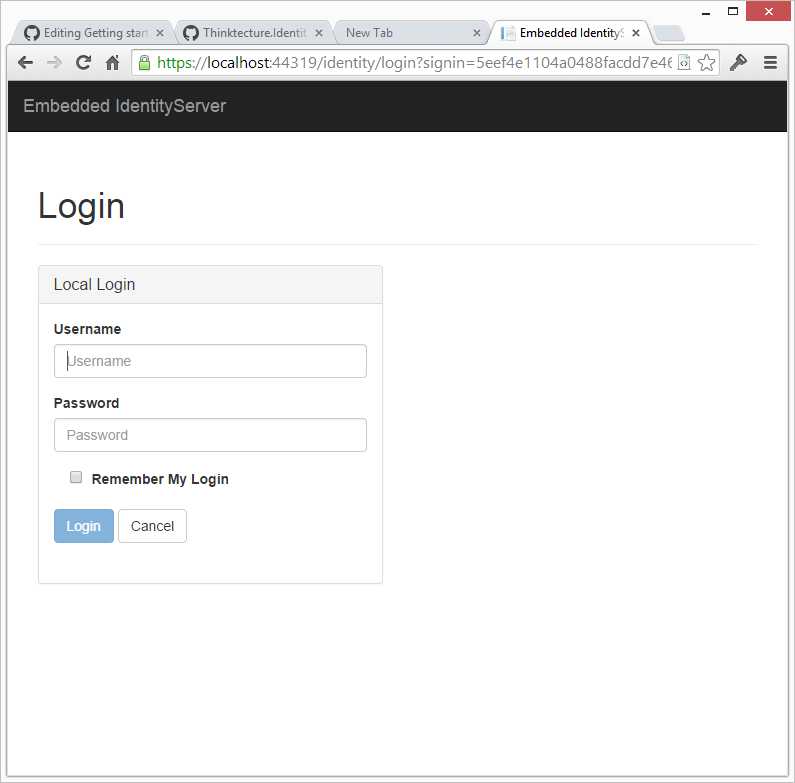
点击About链接将触发认证。identityserver将显示登录页面
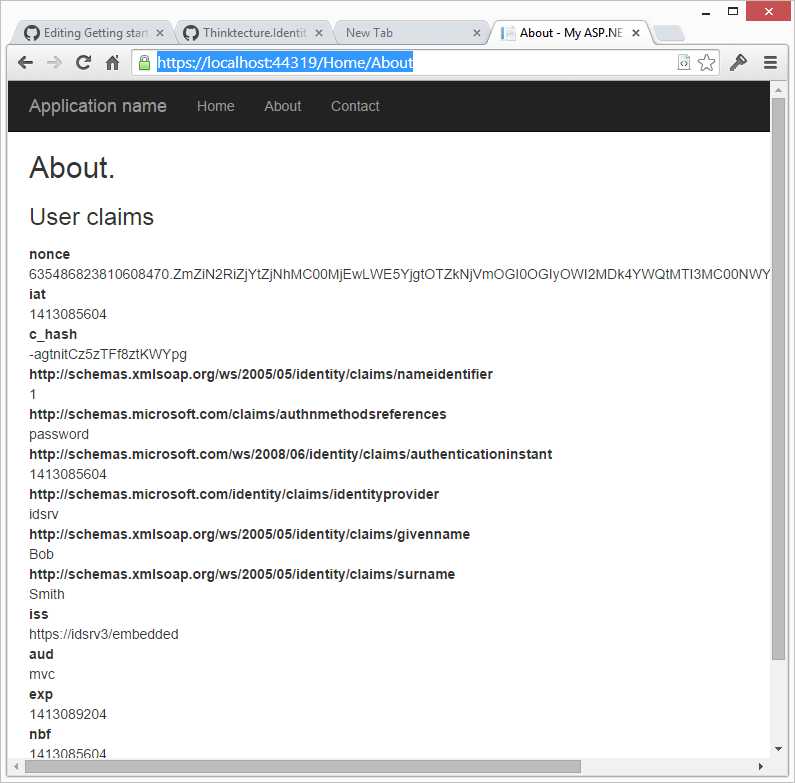
登录成功后可以看到登录信息:
增加Role Claim 和 Scope
在下一步中,我们要向我们的用户添加一些角色声明,我们将在以后使用它来进行授权。
现在我们有了OIDC 标准scope-定义一个角色的scope包括claims,和一些标准属性:
public static class Scopes
{
    public static IEnumerable<Scope> Get()
    {
        var scopes = new List<Scope>
        {
            new Scope
            {
                Enabled = true,
                Name = "roles",
                Type = ScopeType.Identity,
                Claims = new List<ScopeClaim>
                {
                    new ScopeClaim("role")
                }
            }
        };

        scopes.AddRange(StandardScopes.All);

        return scopes;
    }
}
改变在Startup.cs的factory类使用定义的scope
Factory = new IdentityServerServiceFactory()
    .UseInMemoryUsers(Users.Get())
    .UseInMemoryClients(Clients.Get())
    .UseInMemoryScopes(Scopes.Get()),
下一步我们为bob添加几个Claim
public static class Users
{
    public static IEnumerable<InMemoryUser> Get()
    {
        return new[]
        {
            new InMemoryUser
            {
                Username = "bob",
                Password = "secret",
                Subject = "1",

                Claims = new[]
                {
                    new Claim(Constants.ClaimTypes.GivenName, "Bob"),
                    new Claim(Constants.ClaimTypes.FamilyName, "Smith"),
                    new Claim(Constants.ClaimTypes.Role, "Geek"),
                    new Claim(Constants.ClaimTypes.Role, "Foo")
                }
            }
        };
    }
}
改变中间件配置:
app.UseOpenIdConnectAuthentication(new OpenIdConnectAuthenticationOptions
    {
        Authority = "https://localhost:44319/identity",

        ClientId = "mvc",
        Scope = "openid profile roles",
        RedirectUri = "https://localhost:44319/",
        ResponseType = "id_token",

        SignInAsAuthenticationType = "Cookies"
    });
成功验证后,您现在应该看到用户Claim集合中的角色Claim
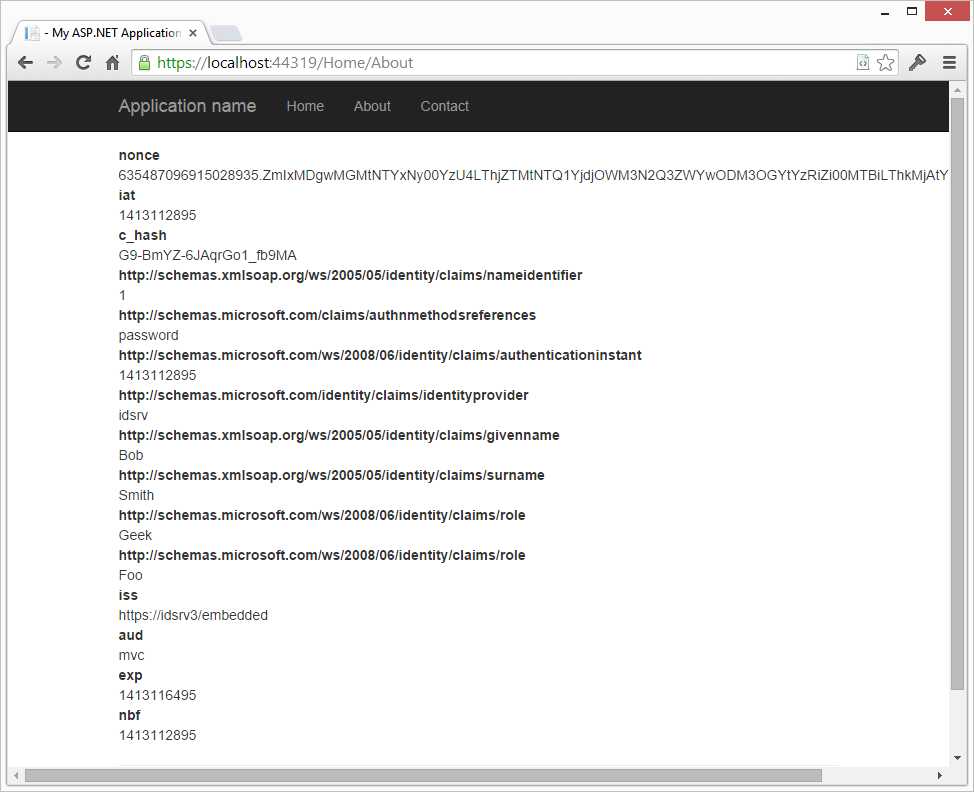
Claims 转换
默认情况下那些Claims看起像这样:
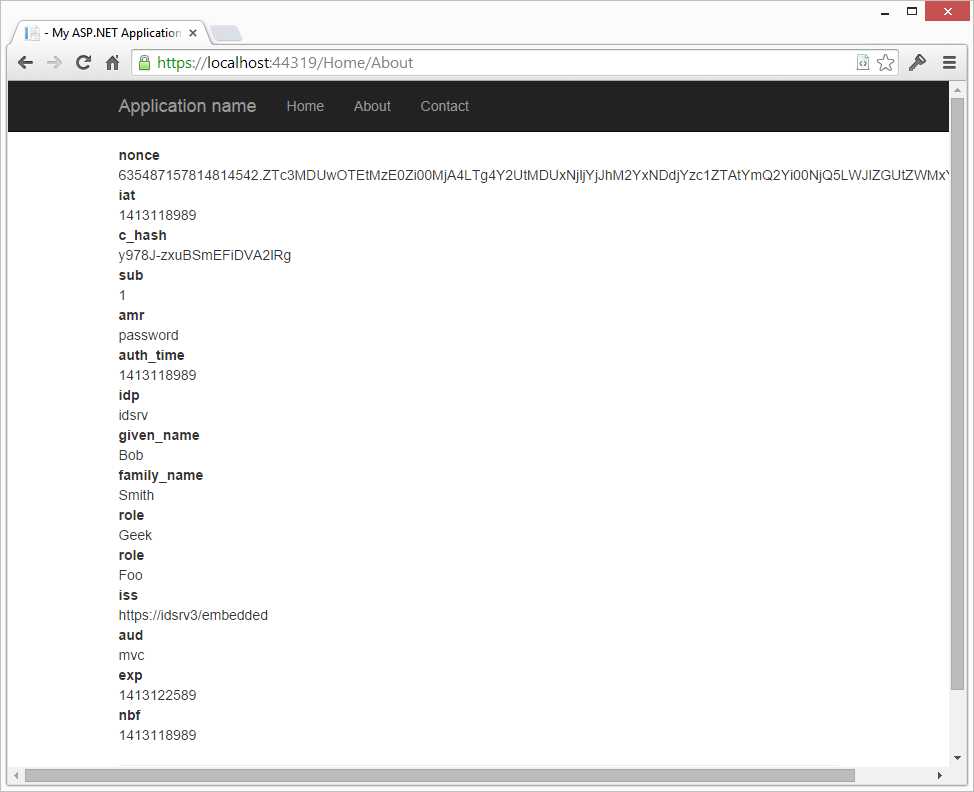
通过配置可以控制哪些claim需要被记录:
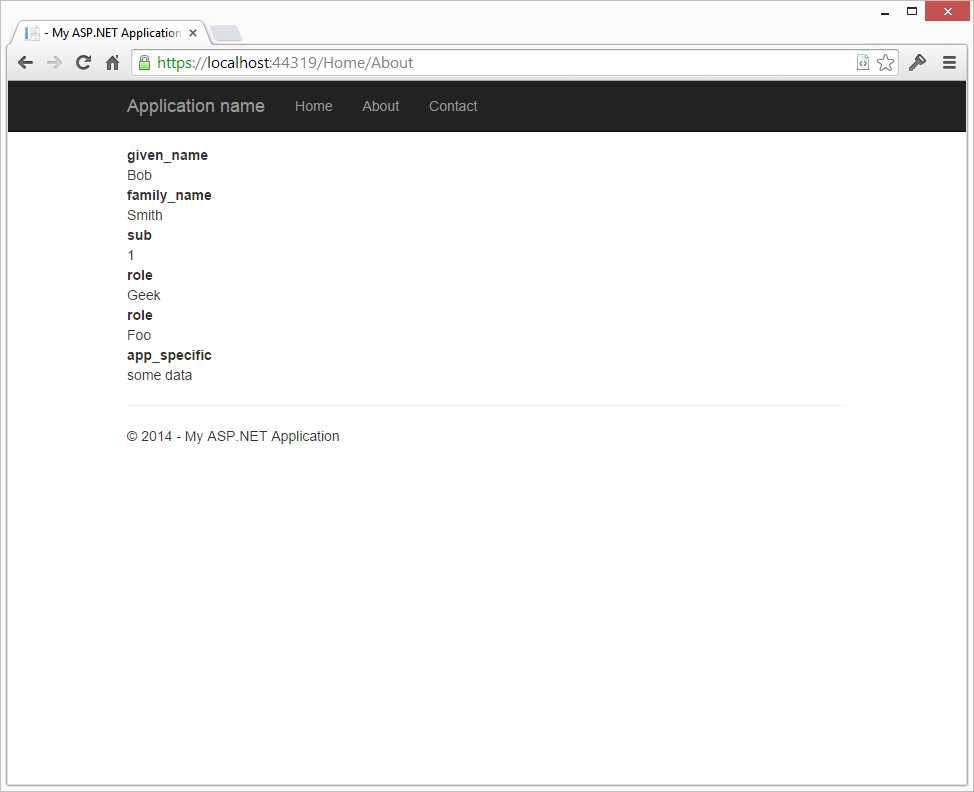
app.UseOpenIdConnectAuthentication(new OpenIdConnectAuthenticationOptions
    {
        Authority = "https://localhost:44319/identity",

        ClientId = "mvc",
        Scope = "openid profile roles",
        RedirectUri = "https://localhost:44319/",
        ResponseType = "id_token",

        SignInAsAuthenticationType = "Cookies",
        UseTokenLifetime = false,

        Notifications = new OpenIdConnectAuthenticationNotifications
        {
            SecurityTokenValidated = async n =>
                {
                    var id = n.AuthenticationTicket.Identity;

                    // we want to keep first name, last name, subject and roles
                    var givenName = id.FindFirst(Constants.ClaimTypes.GivenName);
                    var familyName = id.FindFirst(Constants.ClaimTypes.FamilyName);
                    var sub = id.FindFirst(Constants.ClaimTypes.Subject);
                    var roles = id.FindAll(Constants.ClaimTypes.Role);

                    // create new identity and set name and role claim type
                    var nid = new ClaimsIdentity(
                        id.AuthenticationType,
                        Constants.ClaimTypes.GivenName,
                        Constants.ClaimTypes.Role);

                    nid.AddClaim(givenName);
                    nid.AddClaim(familyName);
                    nid.AddClaim(sub);
                    nid.AddClaims(roles);

                    // add some other app specific claim
                    nid.AddClaim(new Claim("app_specific", "some data"));

                    n.AuthenticationTicket = new AuthenticationTicket(
                        nid,
                        n.AuthenticationTicket.Properties);
                }
        }
    });
在添加上述代码后,我们的Claims现在看起来像这样:
Authorization
现在,我们有身份验证和一些声明,我们可以开始添加简单的授权规则。
MVC有一个内置的属性称为[Authorize]身份验证的用户,您还可以使用此属性来诠释角色成员资格要求。我们不建议这种方法,因为这通常会导致代码,混合的关注,如业务/控制器逻辑和授权政策。我们建议将授权逻辑从控制器中分离,从而导致更清洁的代码和更好的可测性(在 here 阅读更多)。
Resource Authorization
要添加新的授权基础设施和新的属性,我们添加NuGet包:
install-package Thinktecture.IdentityModel.Owin.ResourceAuthorization.Mvc
[ResourceAuthorize("Read", "ContactDetails")]
public ActionResult Contact()
{
    ViewBag.Message = "Your contact page.";

    return View();
}
请注意,属性是不表达权限,我们单独的逻辑去控制权限:
public class AuthorizationManager : ResourceAuthorizationManager
{
    public override Task<bool> CheckAccessAsync(ResourceAuthorizationContext context)
    {
        switch (context.Resource.First().Value)
        {
            case "ContactDetails":
                return AuthorizeContactDetails(context);
            default:
                return Nok();
        }
    }

    private Task<bool> AuthorizeContactDetails(ResourceAuthorizationContext context)
    {
        switch (context.Action.First().Value)
        {
            case "Read":
                return Eval(context.Principal.HasClaim("role", "Geek"));
            case "Write":
                return Eval(context.Principal.HasClaim("role", "Operator"));
            default:
                return Nok();
        }
    }
}
最后在Startup.cs中添加配置:
app.UseResourceAuthorization(new AuthorizationManager());
运行示例,并通过代码来熟悉验证的流程。
Role Authorization
通过重写AuthorizeAttribute控制返回的结果
// Customized authorization attribute:
public class AuthAttribute : AuthorizeAttribute
{
    protected override void HandleUnauthorizedRequest(AuthorizationContext filterContext)
    {
        if (filterContext.HttpContext.User.Identity.IsAuthenticated)
        {
            // 403 we know who you are, but you haven‘t been granted access
            filterContext.Result = new HttpStatusCodeResult(System.Net.HttpStatusCode.Forbidden);
        }
        else
        {
            // 401 who are you? go login and then try again
            filterContext.Result = new HttpUnauthorizedResult();
        }
    }
}

// Usage:
[Auth(Roles = "Geek")]
public ActionResult About()
{
    // ...
}
其他的授权和处理访问被拒绝的情况
通过在HomeController中添加一个新的Action来进行更多的授权:
[ResourceAuthorize("Write", "ContactDetails")]
public ActionResult UpdateContact()
{
    ViewBag.Message = "Update your contact details!";

    return View();
}
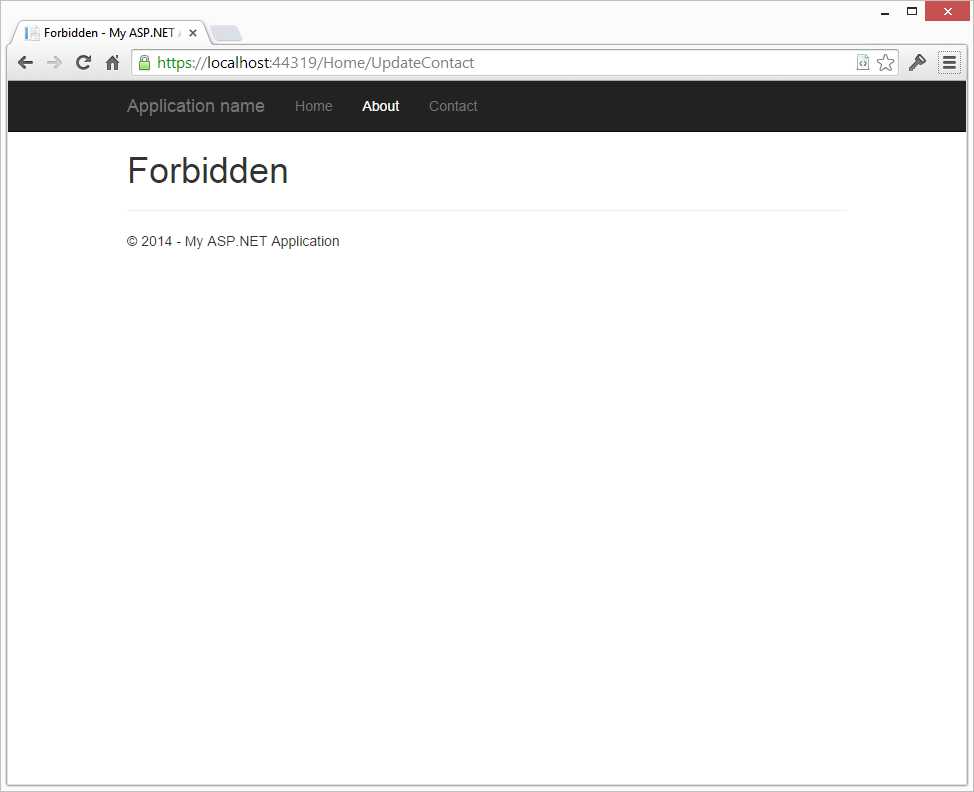
当你试图访问这个地址的时候,你会看到一个被禁止的错误页面。
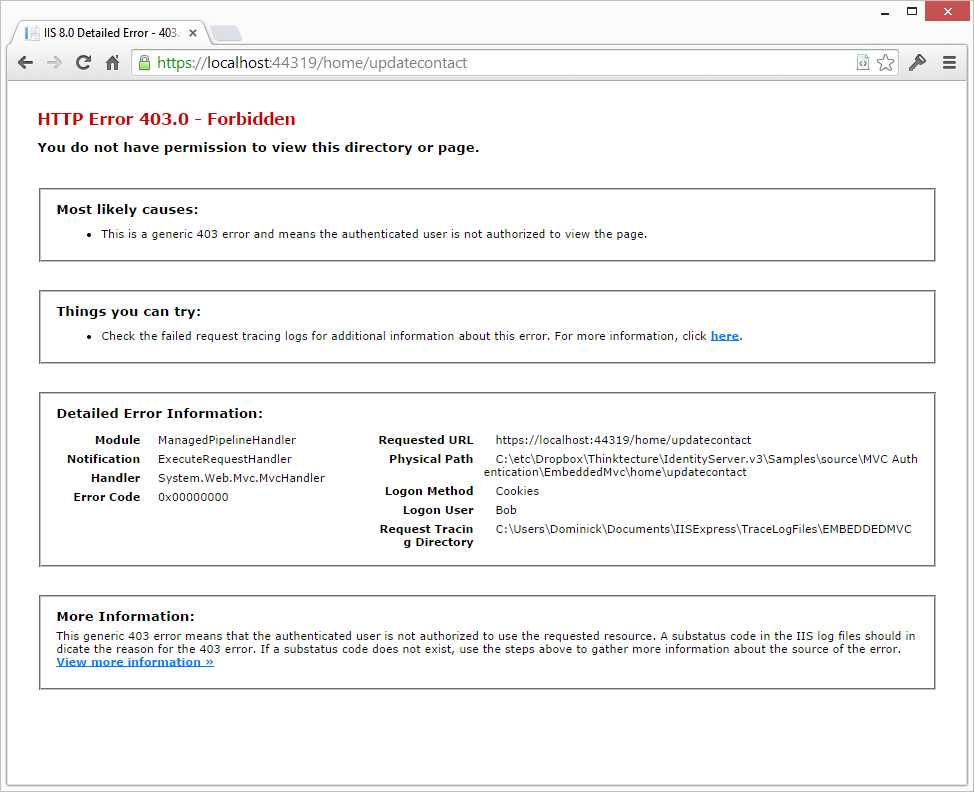
事实上,如果用户已经通过认证,你会看到不同的响应。如果不是MVC将重定向到登录页面,如果通过验证,您会看到禁止响应。这是由设计(阅读更多 here)。
你可以通过检查403个状态码来处理这个被禁止的情况,我们提供了一个这样的过滤框:
[ResourceAuthorize("Write", "ContactDetails")]
[HandleForbidden]
public ActionResult UpdateContact()
{
    ViewBag.Message = "Update your contact details!";

    return View();
}
添加HandleForbidden 后,看起是这样:
你也可以使用授权管理器势在必行,这给你更多的选择:
[HandleForbidden]
public ActionResult UpdateContact()
{
    if (!HttpContext.CheckAccess("Write", "ContactDetails", "some more data"))
    {
        // either 401 or 403 based on authentication state
        return this.AccessDenied();
    }

    ViewBag.Message = "Update your contact details!";
    return View();
}