activemq安装与简单消息发送接收实例
安装环境:
Activemq5.11.1, jdk1.7(activemq5.11.1版本需要jdk升级到1.7),虚拟机: 192.168.147.131
[root@localhost software]# pwd
/export/software
[root@localhost software]# tar -zxvf apache-activemq-5.11.1-bin.tar.gz
[root@localhost software]# mv apache-activemq-5.11.1 /usr/local
配置Nginx代理Activemq后台管理应用默认绑定的8161端口
upstream tomcat_tools.activemq.local {
        server 127.0.0.1:8161  weight=10 max_fails=2 fail_timeout=300s;
}
server {
        listen                   80;
        server_name              tools.activemq.local.com;
        root                     /usr/local/apache-activemq-5.11.1/webapps/;
        access_log               /usr/local/apache-activemq-5.11.1/logs/tools.activemq.local.com_access.log main;
        error_log                /usr/local/apache-activemq-5.11.1/logs/tools.activemq.local.com_error.log warn;
        error_page               403 404 /40x.html;

        location / {
            index index.html index.htm;
            proxy_next_upstream     http_500 http_502 http_503 http_504 error timeout invalid_header;
            proxy_set_header        Host  $host;
            proxy_set_header       X-Real-IP        $remote_addr;
            proxy_set_header        X-Forwarded-For $proxy_add_x_forwarded_for;
            proxy_pass              http://tomcat_tools.activemq.local;
        }

        #静态文件,nginx自己处理
            location ~ ^/(images|javascript|js|css|flash|media|static)/ {

                    #过期30天,静态文件不怎么更新,过期可以设大一点,
                    #如果频繁更新,则可以设置得小一点。
                    expires 30d;
            }
}
重启nginx
启动activemq
[root@localhost linux-x86-64]# pwd
/usr/local/apache-activemq-5.11.1/bin/linux-x86-64
[root@localhost linux-x86-64]# ./activemq start
配置host[192.168.147.131 tools.activemq.local.com]
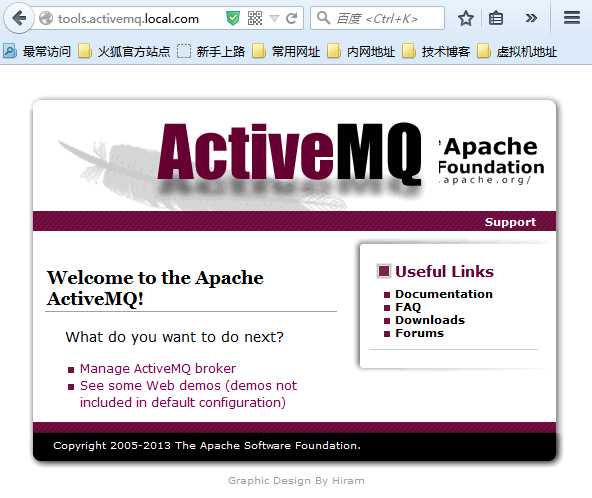
登录activemq的后台,默认账号 admin/admin
http://tools.activemq.local.com/admin

实例展示MQ消息的发送和接收[消息类型分为queue 和 Topics,实例展示为queue类型消息发送]
pom引入
 <dependency>
     <groupId>org.apache.activemq</groupId>
     <artifactId>activemq-all</artifactId>
     <version>5.11.1</version>
 </dependency>
1、定义消息destination和brokerUrl[61616为activemq用于消息通讯的端口]
public class Constant {

    public static final String brokerURL = "tcp://192.168.147.131:61616";

    public static final String queueDestination = "testQueue";
}
2、编写消息的发送程序
import javax.jms.*;
import org.apache.activemq.ActiveMQConnection;
import org.apache.activemq.ActiveMQConnectionFactory;

/**
 * created on 2015/6/4
 * @author dennisit@163.com
 * @version 1.0
 */
public class MqSender {

    public static void main(String[] args) throws JMSException {
        ConnectionFactory factory = new ActiveMQConnectionFactory(ActiveMQConnection.DEFAULT_USER,
                ActiveMQConnection.DEFAULT_PASSWORD, Constant.brokerURL);
        Connection connection = factory.createConnection();
        connection.start();
        Session session = connection.createSession(Boolean.TRUE, Session.AUTO_ACKNOWLEDGE);
        Destination destination = session.createQueue(Constant.queueDestination);
        MessageProducer producer = session.createProducer(destination);
        producer.setDeliveryMode(DeliveryMode.NON_PERSISTENT);
        ObjectMessage message = session.createObjectMessage("hello world...");
        producer.send(message);
        session.commit();
        System.out.println("send...");
    }

}
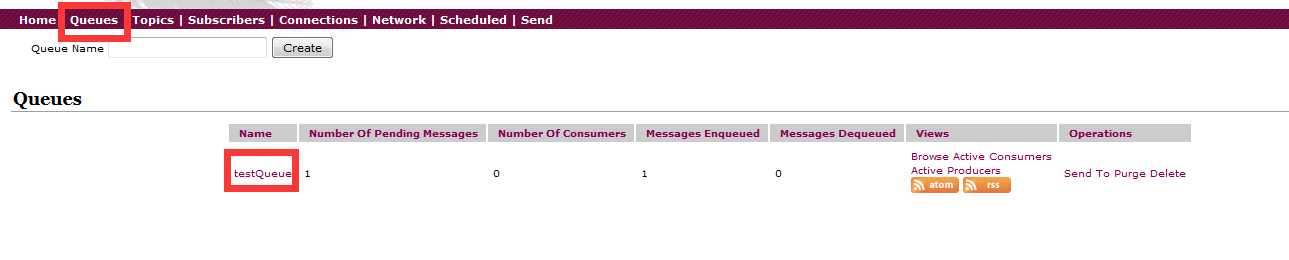
执行消息发送,在管理后台查看
3、编写消息的消费程序
import javax.jms.Connection;
import javax.jms.ConnectionFactory;
import javax.jms.Destination;
import javax.jms.JMSException;
import javax.jms.MessageConsumer;
import javax.jms.ObjectMessage;
import javax.jms.Session;

import org.apache.activemq.ActiveMQConnection;
import org.apache.activemq.ActiveMQConnectionFactory;

/**
 * created on 2015/6/4
 * @author dennisit@163.com
 * @version 1.0
 */
public class MqReceiver {

    public static void main(String[] args) throws JMSException {
        ConnectionFactory factory = new ActiveMQConnectionFactory(ActiveMQConnection.DEFAULT_USER, ActiveMQConnection.DEFAULT_PASSWORD,
                Constant.brokerURL);
        Connection connection = factory.createConnection();
        connection.start();
        Session session = connection.createSession(Boolean.TRUE, Session.AUTO_ACKNOWLEDGE);
        Destination destination = session.createQueue(Constant.queueDestination);

        MessageConsumer consumer = session.createConsumer(destination);
        ObjectMessage message = (ObjectMessage)consumer.receive();
        if (message != null) {
            String messageString = (String)message.getObject();
            System.out.println("Receive : " + messageString);
        }
    }
}
执行这段代码会输出接收到的消息内容:

管理后台在查看queue中心结果如下:

文章来自:http://www.cnblogs.com/dennisit/p/4551182.html